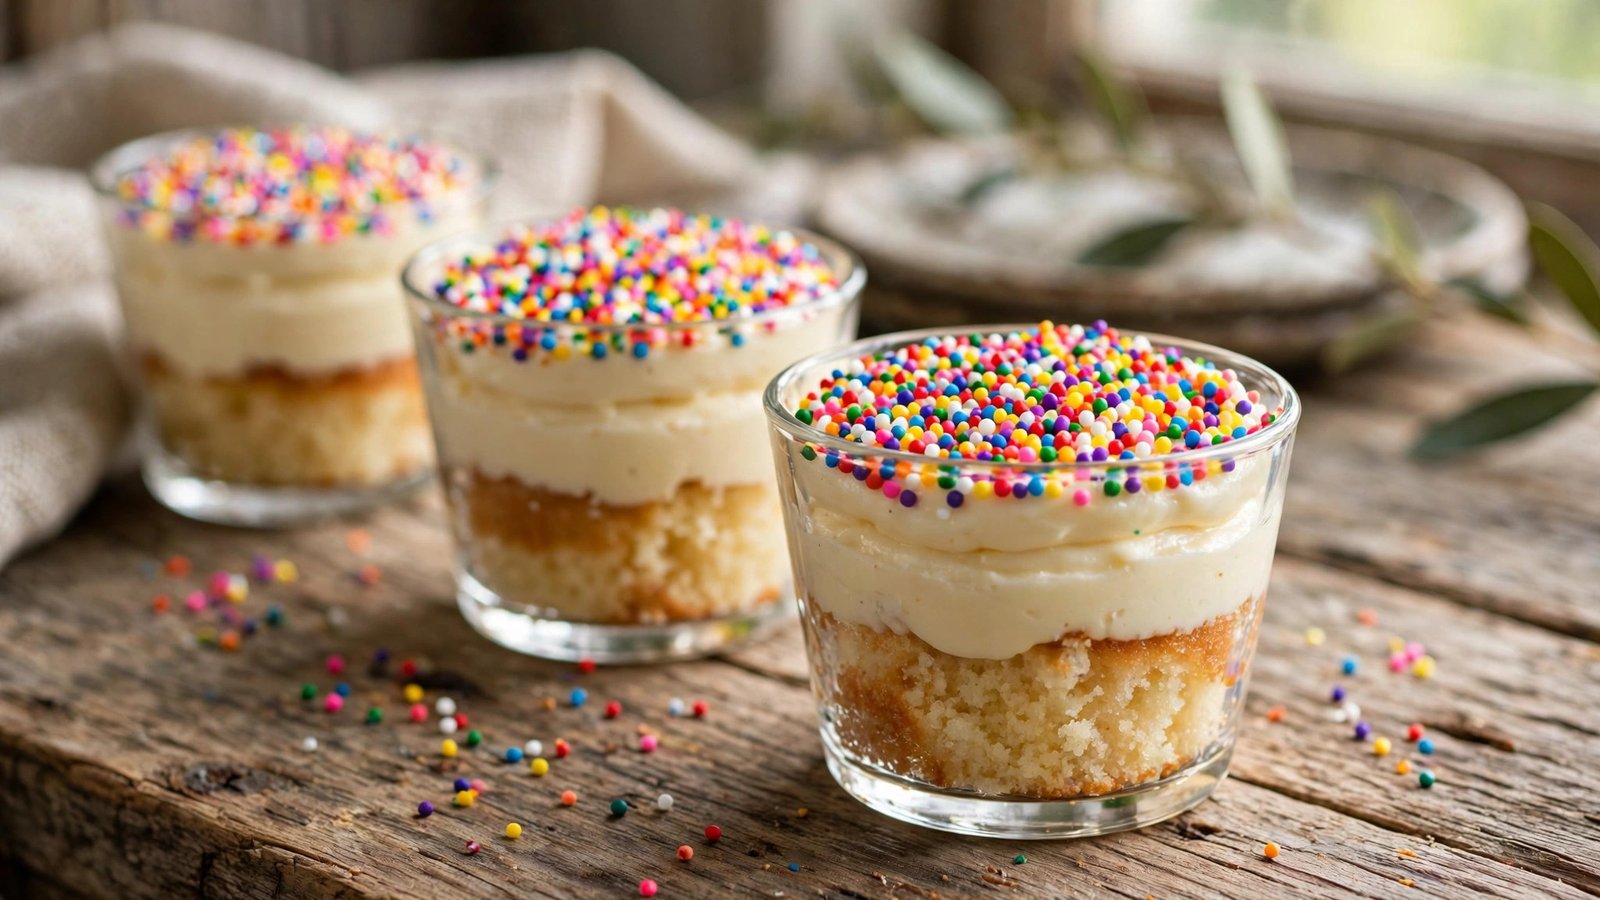
There is a new dessert breaking the internet, and it comes in a tiny cup. Viral Dot Cakes are the single-serving layered treats everyone is suddenly obsessed with — a moist vanilla cake base, a fluffy layer of sweet vanilla icing, and a gloriously thick blanket of colorful nonpareil sprinkles on top. No slicing, no sharing required, no complicated decorating. Just grab a spoon and dig straight through all three layers.
These little cakes blew up when Costco started selling mini dot cakes in October 2026, and home bakers immediately began recreating them in jars, ramekins, and paper cups. The appeal is obvious: each bite delivers soft cake, creamy frosting, and that delightful crackle-crunch of sprinkles all at once. They are naturally nut-free and sesame-free, which makes them perfect for parties, bake sales, and lunchbox surprises where allergies matter. Best of all, you do not need any piping skills or special equipment — if you can stir batter and spoon icing, you can make dot cakes.
Why You’ll Love This Dot Cakes Recipe
- Genuinely viral-worthy: These are the actual trend everyone is posting — make the internet-famous treat at home before the hype moves on.
- Three perfect layers in every spoonful: Tender vanilla cake, sweet creamy icing, and a crunchy confetti cap of sprinkles create an unbeatable texture contrast.
- Nut-free and sesame-free: A celebration dessert that nearly everyone can enjoy, ideal for school events and mixed-crowd parties.
- No decorating skills needed: No piping bags, no fondant, no smoothing techniques. Spoon the icing on and bury it in sprinkles.
- Party-perfect portions: Baked in individual cups or jars, they are ready to grab, gift, and transport with zero slicing mess.
- Endlessly customizable: Swap the sprinkle colors for holidays, birthdays, team colors, or any theme you can imagine.
Ingredients
For the Vanilla Cake Base:
- 1 ½ cups (190g) all-purpose flour
- 1 cup (200g) granulated sugar
- 1 ½ teaspoons baking powder
- ¼ teaspoon fine salt
- ½ cup (115g) unsalted butter, softened to room temperature
- 2 large eggs, at room temperature
- ½ cup (120ml) whole milk, at room temperature
- 2 teaspoons pure vanilla extract
For the Sweet Vanilla Icing:
- ½ cup (115g) unsalted butter, softened to room temperature
- 2 cups (240g) powdered sugar, sifted
- 2 tablespoons heavy cream or whole milk
- 1 teaspoon pure vanilla extract
- Pinch of fine salt
For Assembly:
- 1 to 1 ½ cups rainbow nonpareil sprinkles
- 12 small dessert cups, 4-ounce mason jars, or standard cupcake liners in a muffin tin
Instructions
- Preheat the oven: Set your oven to 350°F (175°C). If using cupcake liners, place them in a standard 12-cup muffin tin. If baking in ramekins or jars, there is no need to grease for this recipe since the cake will be served in its container — but a light spritz of nonstick spray makes crumbly bottoms easier to spoon through.
- Mix the dry ingredients: In a medium bowl, whisk together the flour, granulated sugar, baking powder, and salt until evenly combined. Breaking up any lumps now guarantees a smooth, tender crumb later.
- Cream the butter and sugar base: In a large mixing bowl, beat the softened butter with an electric mixer on medium speed for about 2 minutes until pale and fluffy. Add the dry mixture along with the eggs, milk, and vanilla extract, then beat on low speed just until combined, about 30 seconds. Finish with 30 more seconds on medium to build a silky batter — do not overmix, or the cake will turn dense.
- Fill and bake: Divide the batter evenly among your 12 cups or liners, filling each about two-thirds full (roughly 3 tablespoons per cup). Bake for 18–22 minutes, until the tops are lightly golden and a toothpick inserted in the center comes out clean or with a few moist crumbs. If you are baking directly in glass jars, add 2–3 extra minutes since glass insulates more than metal.
- Cool completely: Transfer the cups to a wire rack and let them cool for at least 45 minutes. The icing will melt into a puddle if the cake is even slightly warm, so patience here is non-negotiable.
- Make the vanilla icing: While the cakes cool, beat the softened butter on medium-high speed for 2 minutes until creamy. Add the sifted powdered sugar one cup at a time on low speed, then add the heavy cream, vanilla, and salt. Beat on medium-high for 2–3 minutes until light, fluffy, and spreadable. If it is too thick, add cream a teaspoon at a time; if too thin, add a spoonful of powdered sugar.
- Ice each cake: Spoon about 2 tablespoons of icing onto each cooled cake and spread it into an even layer roughly ½ inch thick. A small offset spatula or the back of a spoon works perfectly — rustic swirls are part of the charm.
- Add the dot layer: Pour the rainbow nonpareils into a shallow bowl. Generously spoon or press them over the icing so it is completely covered in a thick, even layer — about 1 to 2 tablespoons per cake. Gently pat them down so they adhere. This is the signature “dot” top, so do not be shy.
- Chill to set (optional but recommended): Refrigerate the finished dot cakes for 20–30 minutes. This firms the icing slightly so the layers hold their shape when you dig in with a spoon.
- Serve: Serve chilled or at cool room temperature. Hand everyone a spoon and watch them disappear.
Tips for the Best Dot Cakes
- Use nonpareils, not jimmies or sanding sugar. True dot cakes have that dense carpet of tiny round dots — jimmies give a different look and less crunch per bite.
- Room-temperature butter, eggs, and milk are essential for a smooth batter and a lump-free icing. Cold ingredients cause curdling and a heavy crumb.
- Sift the powdered sugar before making the icing. Even small lumps of powdered sugar will not dissolve and will leave gritty specks in an otherwise silky frosting.
- Do not overfill the cups. Two-thirds full gives the batter room to rise into a gentle dome that holds the icing layer nicely; overfilled cups spill over and bake unevenly.
- Work quickly once the icing is spread. Nonpareils stick best to freshly spread, slightly tacky icing — if the surface crusts over, the sprinkles will bounce off.
- For the cleanest layered look in clear jars, bake the cake in the jar, then build the layers visibly through the glass. It is the most photogenic version for social media.
Variations
- Chocolate dot cakes: Replace ¼ cup of the flour with unsweetened cocoa powder and add ¼ cup extra milk for a rich chocolate base under the same vanilla icing.
- Funfetti dot cakes: Fold ⅓ cup of rainbow jimmies into the batter before baking for sprinkles inside and out.
- Holiday themes: Use red and green nonpareils for Christmas, pastel mixes for Easter, or black and orange for Halloween. One batch of cake and icing becomes a whole seasonal lineup.
- Lemon dot cakes: Add 1 tablespoon of lemon zest to the cake batter and 1 teaspoon of fresh lemon juice to the icing for a bright, citrusy twist.
- Strawberry dot cakes: Beat 2 tablespoons of freeze-dried strawberry powder into the icing for a naturally pink, berry-flavored layer.
Storage & Reheating
Store finished dot cakes in an airtight container in the refrigerator for up to 5 days. The icing firms up when cold and the sprinkles stay crunchy. Let them sit at room temperature for 15–20 minutes before serving so the cake softens and the flavors open up. For longer storage, freeze the iced cakes (before adding sprinkles) in a single layer for up to 2 months; thaw overnight in the fridge, then add the fresh sprinkle layer just before serving so it stays crisp and vibrant. There is no reheating needed — these are served cool.
Frequently Asked Questions
Are dot cakes really nut-free and sesame-free?
Yes, as written this recipe contains no nuts or sesame. Always check your sprinkle labels, though — some sprinkle brands are manufactured in facilities that also process nuts, so look for certified allergen-free sprinkles if serving someone with a severe allergy.
Can I bake the cake in a regular pan and cut it into portions?
You can, but you will lose the signature layered look. The magic of dot cakes is the visible strata in each individual cup. If you must use a pan, bake in an 8×8-inch pan for 25–30 minutes, cut into 12 squares, and top each square with icing and sprinkles.
My sprinkles are sliding off the icing. What went wrong?
The icing surface likely crusted over before you added them. Apply sprinkles within a minute or two of spreading each cake’s icing, and press them down gently. If the icing has already set, spread a very thin fresh skim of icing on top as “glue” and try again.
Can I make these ahead for a party?
Absolutely. Bake the cakes and make the icing up to 2 days ahead, storing both covered in the fridge. Assemble with sprinkles the day of the event for maximum crunch and color. Fully assembled dot cakes also hold well for 2–3 days refrigerated.
Serve these little showstoppers at your next gathering and watch the phones come out before the spoons do. Viral Dot Cakes are proof that the simplest ideas — cake, icing, sprinkles — become unforgettable when they are stacked in perfect little layers. Make a batch, snap your photo, and enjoy every crunchy, creamy, cakey bite.