
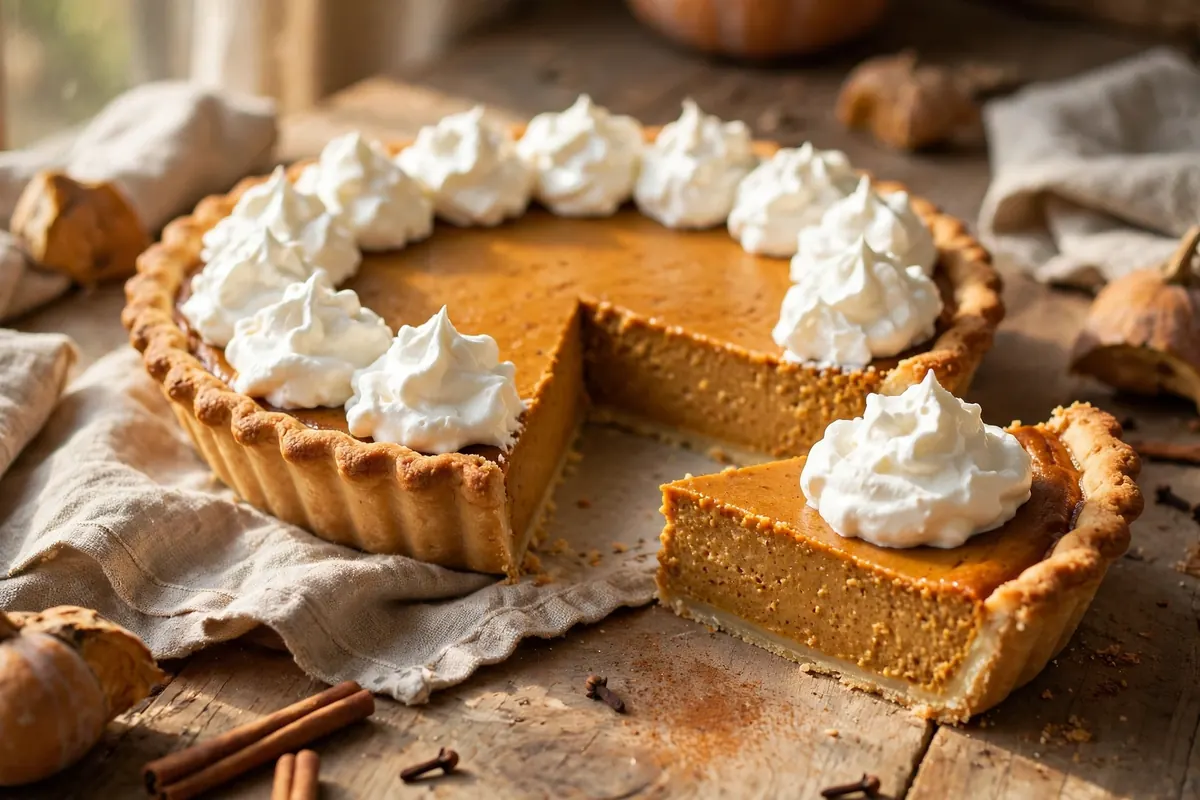
Prep: 20 minutes | Cook: 55 minutes | Serves: 8
There is a moment every Thanksgiving when the kitchen goes quiet for a second and everyone just breathes in. That is usually the pumpkin pie coming out of the oven. The smell of cinnamon and nutmeg fills the whole house, and suddenly nobody cares that the turkey still needs another twenty minutes. This is the pie I make every single year, and it has never let me down.
What makes this version so reliable is that it keeps things simple. There is no fancy technique here and nothing you have to buy specially. You start with a can of plain pumpkin puree, a handful of warm spices, eggs, and evaporated milk. The filling comes together in one bowl with a whisk, and the oven does the rest. The trick is the two-temperature bake. You start hot so the crust sets and stays crisp, then you drop the heat so the filling bakes gently and turns out silky instead of puffed up and cracked.
If you have only ever had pumpkin pie from a bakery box, this one will surprise you. It is lighter, the spice is warmer, and the filling actually tastes like pumpkin instead of just sugar. Make it the day before Thanksgiving and it will be one less thing to think about when the big day arrives. A slice with a cloud of whipped cream on top is, in my opinion, the best ending a holiday meal can have.
Why You’ll Love This Recipe
First, it is genuinely easy. The filling takes about ten minutes to mix, and there is no stovetop cooking, no straining, and no water bath. If you can whisk eggs in a bowl, you can make this pie. Second, it is forgiving. The two-temperature bake protects you from the two most common pumpkin pie problems, which are a soggy bottom crust and a cracked top. Starting at 425°F firms up the crust fast, and finishing at 350°F lets the custard set slowly and evenly.
Third, the flavor is exactly what a pumpkin pie should be. The pumpkin comes through clearly because we use plain puree and a modest amount of sugar. The cinnamon leads, the ginger adds warmth, and the nutmeg and cloves sit quietly in the background. Nothing overpowers anything else. And finally, this pie is a great make-ahead dessert. It actually tastes better the next day, once the spices have had time to settle into the filling. Bake it on Wednesday, keep it in the fridge, and serve it cold or at room temperature on Thursday.
Ingredients
- 1 unbaked 9-inch pie crust, homemade or store-bought
- 1 can (15 ounces) pumpkin puree (not pumpkin pie filling)
- 3/4 cup granulated sugar
- 1 teaspoon ground cinnamon
- 1/2 teaspoon ground ginger
- 1/4 teaspoon ground nutmeg
- 1/4 teaspoon ground cloves
- 1/2 teaspoon fine salt
- 2 large eggs
- 1 can (12 ounces) evaporated milk
- 1 teaspoon vanilla extract
- Whipped cream, for serving
Instructions
- Place a rack in the lower third of the oven and heat the oven to 425°F. If you have a baking sheet, put it on the rack now so it heats up too. It catches drips and helps the bottom crust bake.
- Roll out your pie dough and fit it into a 9-inch pie plate. Trim the edge so about half an inch hangs over, then fold it under and crimp it however you like. A simple fork press works fine. Put the crust in the fridge while you mix the filling so the butter stays cold.
- Whisk the pumpkin puree, sugar, cinnamon, ginger, nutmeg, cloves, and salt together in a large bowl until smooth. This takes about a minute and you want the spices fully mixed in before the eggs go in.
- Beat the eggs lightly in a small bowl, then stir them into the pumpkin mixture along with the vanilla extract. Pour in the evaporated milk and whisk until the filling is completely smooth and a little glossy. Do not beat it hard. You are mixing, not whipping, and too much air in the filling can make it puff and crack.
- Pour the filling into the chilled crust. It should come up to just below the rim. If you have a little extra, do not overfill the shell. Bake on the hot baking sheet at 425°F for 15 minutes.
- After 15 minutes, reduce the oven temperature to 350°F without opening the door more than you have to. Keep baking for 40 to 45 minutes. The pie is done when the edges are set and the center still has a slight jiggle, like set gelatin, when you nudge the plate gently. A knife inserted about an inch from the edge should come out clean.
- Let the pie cool on a wire rack for at least 2 hours. The filling continues to set as it cools, so do not cut into it while it is warm or it will slump. Once cool, cover it loosely and refrigerate until you are ready to serve. Serve cold or at room temperature with whipped cream.
Tips for the Best Results
Use plain pumpkin puree, not pumpkin pie filling. The cans look almost identical on the shelf, so read the label. Pie filling already has sugar and spices mixed in, and it will throw off the flavor and sweetness of this recipe. Plain puree gives you full control.
Keep the crust cold right up until the filling goes in. A cold crust holds its shape in the hot oven and bakes up flakier. If your kitchen is warm, pop the lined pie plate in the freezer for ten minutes while you mix the filling.
Do not overbake. This is the single most important tip. Pumpkin pie filling is a custard, and custard keeps cooking after it leaves the oven. Pull the pie out when the center still wobbles a little. If you wait until the whole surface looks firm, it will be overbaked by the time it cools, and that is when cracks appear.
If the crust edge starts browning too fast, cover it loosely with strips of foil or a pie shield for the rest of the bake. This is common with a homemade butter crust. It is much easier to prevent a dark edge than to fix one.
Variations
For a deeper spice flavor, swap the ground spices for 2 teaspoons of pumpkin pie spice and add an extra half teaspoon of cinnamon. Some families like a stronger ginger note, and if that is you, bump the ginger up to 3/4 teaspoon. It gives the pie a gentle warmth that works well with coffee after dinner.
For a richer filling, replace half of the evaporated milk with heavy cream. The pie will be a little denser and more velvety. For a dairy-free version, use full-fat coconut milk in place of the evaporated milk and a dairy-free butter crust. The coconut flavor is faint and it pairs nicely with the spices.
If you want a different crust, a gingersnap crumb crust is wonderful here. Crush about 1 1/2 cups of gingersnap cookies, mix with 5 tablespoons of melted butter, press into the plate, and bake at 350°F for 10 minutes before adding the filling. It adds a snappy, spicy base that people always ask about.
How to Store
Let the pie cool completely, then cover it loosely with plastic wrap or foil and refrigerate for up to 4 days. Pumpkin pie is a custard, so it should not sit out at room temperature for more than 2 hours. Serve it cold straight from the fridge or let slices sit out for about 30 minutes to take the chill off.
To freeze, bake and cool the pie completely, then wrap the whole pie tightly in plastic wrap followed by a layer of foil. It keeps well in the freezer for up to 2 months. Thaw it overnight in the refrigerator before serving. The texture stays smooth as long as you thaw it slowly. Do not freeze a pie topped with whipped cream. Add that fresh when you serve it.
Leftover slices can also be frozen individually. Wrap each slice in plastic wrap and store the slices in a freezer bag. They thaw in the fridge in a few hours and make a very good late-night snack the weekend after Thanksgiving.
Frequently Asked Questions
Can I use fresh pumpkin instead of canned puree?
Yes, and it works well. Roast a small sugar pumpkin until very soft, scoop out the flesh, and puree it until smooth. Let it drain in a fine strainer for about 30 minutes, because fresh pumpkin holds more water than canned. Use the same amount, 1 3/4 cups, in place of the can.
Why did my pumpkin pie crack?
Cracks almost always mean the pie was overbaked or cooled too fast. The filling keeps setting as it cools, so it should still jiggle slightly in the center when you take it out of the oven. Cooling it slowly on the counter instead of putting it straight into the fridge also helps.
Can I make this pie ahead of time?
Absolutely. This is one of the best make-ahead Thanksgiving desserts. Bake it up to two days before you need it and keep it covered in the refrigerator. The flavor actually improves as the spices settle. Bring it out about 30 minutes before serving.
What is the difference between pumpkin puree and pumpkin pie filling?
Pumpkin puree is just cooked, mashed pumpkin with nothing added. Pumpkin pie filling is puree that already has sugar, spices, and sometimes thickeners mixed in. This recipe is written for plain puree, so using pie filling would make the pie too sweet and too heavily spiced.
Can I make this without a store-bought crust?
Yes. A simple homemade crust made with 1 1/4 cups of flour, half a cup of cold butter, half a teaspoon of salt, and 3 to 4 tablespoons of ice water works beautifully. Keep everything cold, handle the dough as little as possible, and chill it for at least 30 minutes before rolling it out.