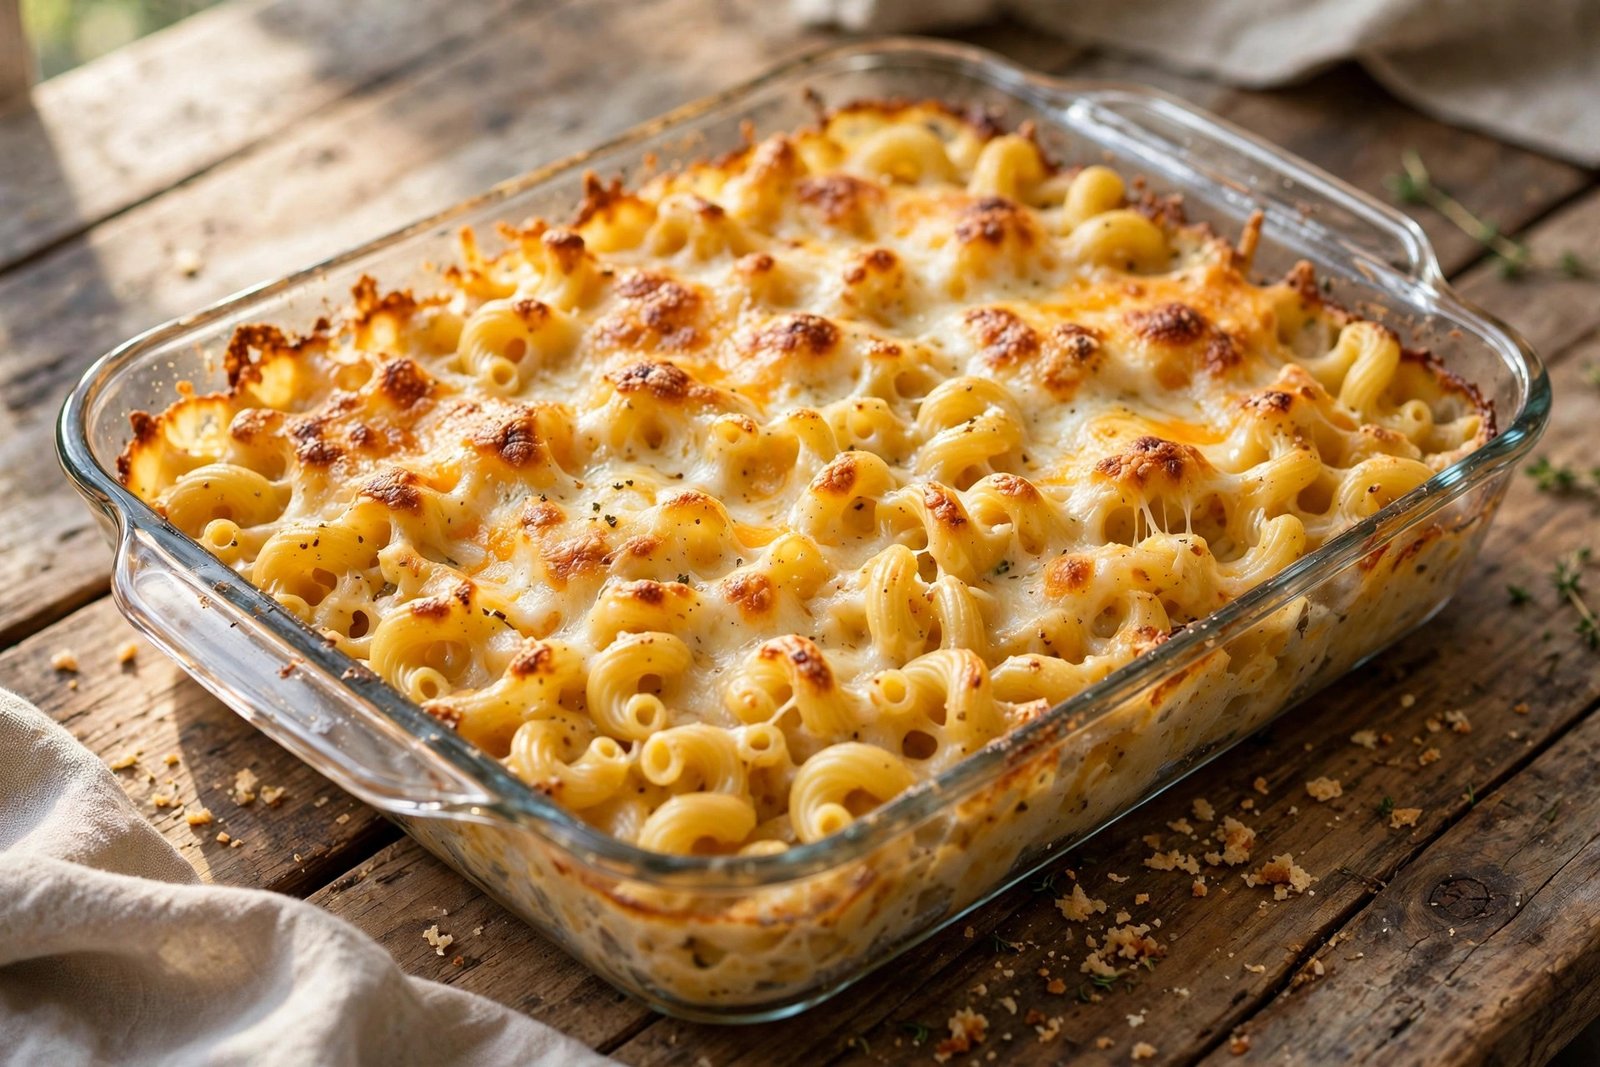
Tini’s Viral Mac and Cheese is the recipe that broke TikTok — literally. Tini Younger’s original mac and cheese video racked up over 100 million views and spawned a thousand copycats, and it’s back in the spotlight again as fall comfort food: 2.5 pounds of cheese packed into a single 9×13 pan of bubbling, golden, baked decadence. This isn’t your boxed weeknight mac. It’s a three-cheese, evaporated-milk-and-heavy-cream cheese bomb with a cavatappi pasta base, a silky from-scratch sauce, and a molten cheese layer baked right through the middle.
Every bite delivers the creamy-crisp contrast that makes baked mac and cheese legendary: the corners and edges go deeply golden and slightly crunchy while the center stays molten and scoopable. The smoked paprika and Dijon mustard give the sauce a gentle depth that keeps all that richness from tipping into bland, and the Colby Jack and cheddar bring the sharp, cheesy punch while mozzarella does what mozzarella does best — stretch for days. Serve it as the centerpiece of a Sunday dinner, haul it to a potluck, or make it the star of your holiday table. This is the kind of dish that silences a room.
Why You’ll Love This Mac and Cheese
- An actual viral recipe: This is the real Tini’s mac and cheese — the one from the 100-million-view TikTok — not an approximation. You can finally taste what the internet has been raving about.
- 2.5 pounds of cheese: Mozzarella, Colby Jack, and cheddar, layered through a creamy sauce and buried in the middle of the dish for a hidden cheese core that melts into pure decadence.
- Silky, never gritty sauce: A simple butter-flour roux with evaporated milk and heavy cream creates a velvety sauce that clings to every piece of pasta — no grainy, broken cheese sauce here.
- Golden baked top: Twenty-five minutes in a hot oven turns the top into a crispy, bubbling, golden-brown crust while the inside stays luxuriously creamy.
- Feeds a crowd: One 9×13 pan serves 10–12 people, making it the perfect potluck, game day, or holiday side dish that disappears fast.
- Easy technique, huge payoff: If you can boil pasta and stir a roux, you can make this. The steps are simple; the result tastes like you went to culinary school.
Ingredients
For the Pasta
- 1 lb cavatappi pasta
- Water and salt for boiling
For the Cheese Blend
- 16 oz low-moisture mozzarella, freshly shredded
- 16 oz Colby Jack, freshly shredded
- 8 oz sharp cheddar, freshly shredded
For the Seasoning Mix
- 1 teaspoon garlic powder
- 1 teaspoon smoked paprika
- 1/2 teaspoon kosher salt
- 1/2 teaspoon freshly ground black pepper
For the Cheese Sauce
- 3 tablespoons unsalted butter
- 3 tablespoons all-purpose flour
- 1 (12 oz) can evaporated milk
- 2 cups heavy cream
- 1 tablespoon Dijon mustard
Instructions
- Prep the oven and dish: Preheat your oven to 375°F. Generously grease a 9×13-inch baking dish with butter or nonstick spray so every corner of the baked pasta releases cleanly.
- Shred all the cheese: Using the large holes of a box grater, shred the mozzarella, Colby Jack, and cheddar. Toss them together in a large bowl so the three cheeses are evenly combined — this blend goes into both the sauce and the layers. Shredding fresh is non-negotiable: the anti-caking starches on pre-shredded cheese keep it from melting into a smooth sauce.
- Mix the seasoning: Stir the garlic powder, smoked paprika, salt, and black pepper together in a small bowl. You’ll use half in the sauce and sprinkle the rest over the top before baking.
- Boil the cavatappi: Bring a large pot of heavily salted water to a rolling boil. Add the cavatappi and cook for 1 minute less than the package’s al dente time — the pasta will finish cooking in the oven, so undercooking now keeps it from turning mushy. Drain well and set aside.
- Make the roux: In a large, heavy-bottomed pot or Dutch oven over medium heat, melt the 3 tablespoons of butter. Whisk in the flour and cook, whisking constantly, for about 1 minute until it forms a smooth, pale-gold paste. Don’t let it brown — you want a blond roux for the lightest color and cleanest flavor.
- Build the sauce base: Pour in the evaporated milk and heavy cream, whisking steadily to dissolve the roux with no lumps. Keep whisking over medium heat for 4–6 minutes until the mixture thickens enough to coat the back of a spoon. The evaporated milk is the secret weapon here: its concentrated milk proteins keep the sauce stable and silky when the cheese goes in.
- Season and cheese the sauce: Whisk in the Dijon mustard and half of the seasoning mix. Reduce the heat to low and add half of the shredded cheese blend, a large handful at a time, stirring until each addition melts before adding the next. Let the pot cool slightly before adding cheese — too much heat makes the sauce grainy. You should end up with a thick, glossy, pourable cheese sauce.
- Combine pasta and sauce: Add the drained cavatappi to the pot and fold it through the sauce until every piece is completely coated. The cavatappi’s ridges and corkscrew shape are ideal — they trap sauce inside every curl.
- Layer the dish: Spread half of the pasta mixture into the prepared 9×13 dish in an even layer. Scatter the remaining shredded cheese evenly over the top to form a molten middle layer. Spoon the rest of the pasta mixture over the cheese layer and spread it smooth. Sprinkle the remaining seasoning mix evenly over the surface.
- Bake until bubbly and golden: Bake at 375°F for 20–25 minutes, until the sauce is bubbling up around the edges and the top is deeply golden with crispy, browned spots. If you want extra browning, you can broil for the final 1–2 minutes — watch it closely so it doesn’t burn.
- Rest before serving: Let the dish rest for 10 minutes before scooping. This sets the sauce slightly so it holds together instead of running all over the plate. Serve hot, straight from the pan, and listen for the silence.
Tips for the Best Mac and Cheese
- Shred your own cheese — always. Pre-shredded cheese is coated in cellulose and starch that resist melting. A few minutes with a box grater is the single biggest upgrade you can make to this recipe.
- Don’t overcook the pasta. Pulling the cavatappi 1 minute shy of al dente is essential because it keeps cooking in the oven. Overcooked pasta goes soft and mushy under all that cheese.
- Keep the heat gentle when adding cheese. Cheese sauce breaks when it boils. Drop the heat to low, let the base cool for a minute, and add cheese gradually while stirring.
- Don’t overbake. You’re just heating through and browning the top — 20–25 minutes is plenty. Past that, the sauce can separate and the cheese turns oily instead of creamy.
- Salt the pasta water generously. This is your only chance to season the pasta itself. The water should taste like the sea.
- Let it rest. Those 10 minutes of resting time are what turn a soupy scoop into a clean, creamy serving. Don’t skip it.
Variations
- Smoky bacon crunch: Fold 8 ounces of chopped, cooked bacon into the pasta mixture and sprinkle buttery panko breadcrumbs over the top before baking for a smoky, crunchy upgrade.
- Buffalo chicken mac: Toss 2 cups of shredded rotisserie chicken with 1/3 cup buffalo sauce and layer it over the cheese middle. Drizzle with a little ranch before serving.
- Lobster or crab mac: For a luxurious holiday version, fold 12 ounces of cooked lobster or lump crab meat into the sauce along with the pasta and finish with a pinch of Old Bay in the seasoning mix.
- Spicy jalapeño popper: Add 2 diced, seeded jalapeños and 4 ounces of softened cream cheese to the sauce for a spicy-creamy kick.
- Gluten-free version: Swap in your favorite gluten-free short pasta and use a 1:1 gluten-free flour blend for the roux. Everything else stays exactly the same.
Storage & Reheating
Let leftovers cool completely, then cover the baking dish tightly or transfer portions to airtight containers. Refrigerate for up to 4 days. Baked mac and cheese reheats best in the oven: cover with foil and warm at 350°F for 15–20 minutes until heated through, adding a splash of milk if it looks dry. For single servings, the microwave works — heat in 1-minute intervals, stirring between, with a tablespoon of milk to loosen the sauce. This dish also freezes well for up to 2 months; thaw overnight in the fridge before reheating in the oven.
Frequently Asked Questions
Can I make Tini’s mac and cheese ahead of time?
Yes. Assemble the full dish through the layering step, cover tightly, and refrigerate for up to 24 hours. Bake straight from the fridge, adding 5–10 minutes to the bake time. For best texture, sprinkle the seasoning over the top just before baking rather than the night before.
Why did my cheese sauce turn out grainy?
Grainy sauce almost always comes from two culprits: heat that was too high, or pre-shredded cheese. Add cheese only over low heat (never boiling), stir until each handful melts before adding more, and shred your own blocks. The evaporated milk also helps — it contains extra milk proteins that stabilize the emulsion.
Can I use a different pasta shape?
You can, but cavatappi is the ideal choice — its corkscrew ridges grab and hold the sauce like nothing else. Elbow macaroni, cellentani, or medium shells are the next-best options. Avoid long or flat shapes that can’t trap the creamy sauce.
Is 2.5 pounds of cheese really necessary?
For this recipe, yes — that mountain of cheese is what makes it Tini’s mac and cheese and not just any baked macaroni. Half melts into the sauce for creaminess, and the rest forms the molten middle layer and the golden, bubbly top. If you want a lighter version, this isn’t the recipe to start with.
Scoop it straight from the pan while the top is still crackling, pair it with something bright and simple — a crisp green salad or roasted broccoli — and let the cheese do the talking. Whether you’re making it for a holiday table, a game day spread, or just because the craving hit, this is the baked mac and cheese that lives up to the hype. Make it once, and it will be the recipe everyone asks you for.