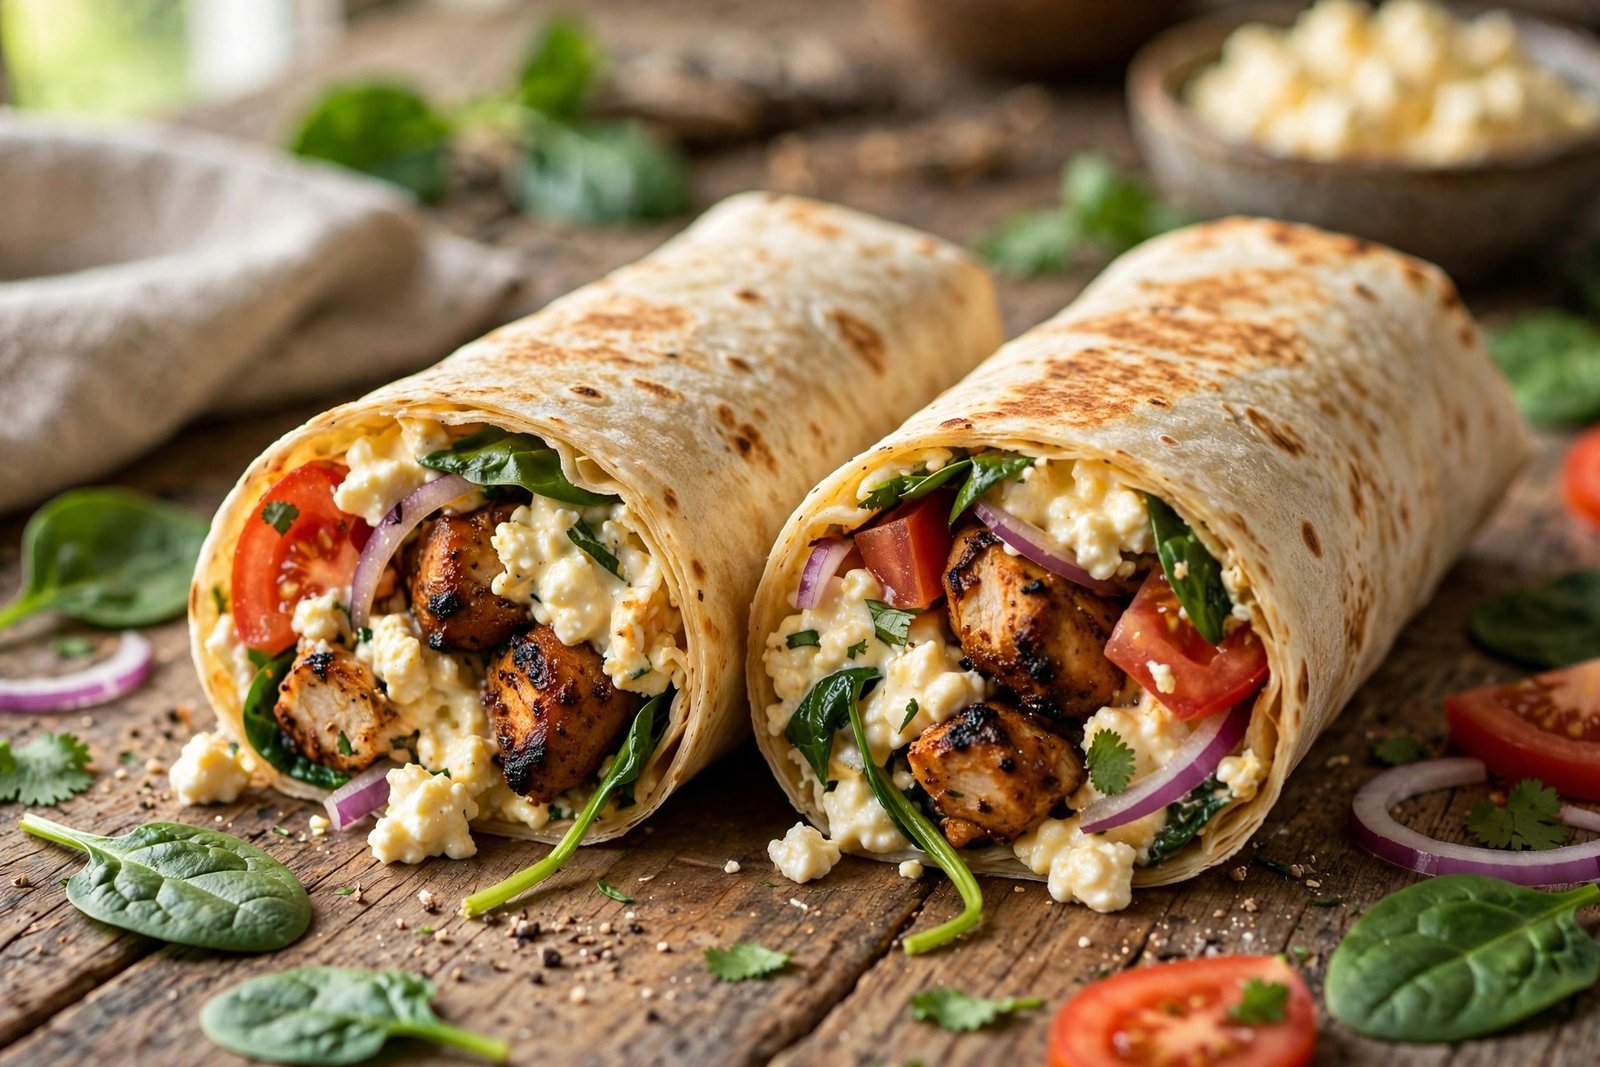
It has over a hundred million views and counting: the viral cottage cheese wrap. Two humble ingredients — cottage cheese and eggs — go into the oven as a thin, wobbly sheet and come out as a golden, bendy, genuinely delicious flourless wrap. Social media loves it because it looks like magic, but home cooks keep making it because it actually works: no flour, no gluten, no protein powder, just real food that crisps at the edges, stays soft in the middle, and holds a full sandwich filling without falling apart.
Whether you are eating low-carb, counting protein, or simply curious about the trend, this recipe is the one worth trying. In this guide you will get the exact technique that keeps the wrap flexible instead of rubbery, how to blend it completely smooth (the non-negotiable step most failed attempts skip), the right temperature and timing for a set-but-pliable finish, and the best filling ideas — from classic turkey club to a desi-inspired chicken tikka wrap. Let us make the internet-famous wrap the right way, so yours looks like the video.
Why You’ll Love This Recipe
The cottage cheese wrap earned its virality honestly. Here is what makes it a keeper long after the trend fades:
- Two ingredients, five minutes of prep. Cottage cheese, eggs, and a pinch of salt is the whole batter. If you can run a blender, you can make this.
- Insanely high in protein. One wrap delivers roughly 20–25 grams of protein before you even add a filling — more than most protein bars, and far more satisfying.
- Naturally flourless and gluten-free. There is no wheat, no almond flour, no psyllium tricks. The eggs and cheese set into a flexible sheet on their own.
- Surprisingly neutral flavor. Baked cottage cheese loses its tang almost entirely. What you taste is a savory, eggy, lightly toasty wrap that pairs with anything from deli turkey to chicken tikka.
- Meal-prep friendly. Bake two or three wraps on Sunday, stack them with parchment, and you have grab-and-go lunches for days.
- Low-carb and keto compatible. At roughly 3–4 grams of carbs per wrap, it fits effortlessly into low-carb and ketogenic eating plans.
Ingredients
Makes 1 large wrap (about 12 x 9 inches). Double or triple as needed — each wrap bakes on its own sheet pan.
- 1 cup (225 g) cottage cheese — small-curd or large-curd both work; full-fat gives the richest, most flexible wrap. Drain off any excess liquid sitting in the container.
- 2 large eggs — these are the structure. The wrap cannot set properly without them.
- 1/4 teaspoon fine sea salt — essential seasoning; cottage cheese alone is bland.
- 1/4 teaspoon garlic powder (optional) — adds savory depth, especially for deli-style fillings.
- Cooking spray or 1 teaspoon olive oil — for the parchment so nothing sticks.
Filling ideas (pick your favorite):
- Chicken tikka wrap: sliced leftover chicken tikka, baby spinach, sliced tomatoes, thin red onion rings, and a drizzle of light mayo or mint raita.
- Turkey club: sliced turkey, crisp lettuce, tomato, avocado, and mustard.
- Mediterranean: grilled chicken, cucumber, roasted red peppers, feta crumbles, and hummus.
- Breakfast: scrambled eggs, smoked salmon or bacon, and cream cheese.
Instructions
Follow these steps exactly — the order matters, especially the blending and the cooling rest at the end.
- Preheat and prep the pan. Heat your oven to 375°F (190°C). Line a standard half-sheet pan (about 13 x 18 inches) with parchment paper — not wax paper — and lightly mist the parchment with cooking spray or rub it with a teaspoon of olive oil. Smooth the parchment flat so there are no wrinkles under the batter.
- Blend until completely smooth. Add the cottage cheese, eggs, salt, and garlic powder (if using) to a blender. Blend on high for 45–60 seconds, scraping down the sides once, until the mixture is utterly silky with no curds visible. This is the most important step: any remaining lumps become weak spots and a lumpy texture in the finished wrap. A food processor works too, but a blender gets it smoothest.
- Spread thin and even. Pour the batter onto the center of the prepared pan. Using an offset spatula or the back of a spoon, spread it into a rough rectangle about 12 x 9 inches, keeping the thickness as even as possible — roughly 1/8 inch. Even thickness is what makes the wrap flexible everywhere instead of crispy in one spot and soggy in another. Do not spread it paper-thin; a little substance keeps it pliable.
- Bake 25–30 minutes. Slide the pan into the center rack and bake for 25 to 30 minutes, until the wrap is set all the way through, matte on top (no wet or jiggly patches in the center), and golden around the edges with light browning across the surface. The edges will puff slightly and crisp — that is normal and delicious.
- Cool on the pan for 5–10 minutes. Do not try to peel the wrap while it is piping hot; it firms up and becomes more flexible as it cools. After about 5 minutes on the pan, you should be able to slide a thin spatula under the edges and lift the whole sheet off the parchment in one piece. Transfer it to a wire rack or clean cutting board to cool for another 5 minutes.
- Fill it. Lay the wrap flat, spread your sauce or mayo down the center third (leave a 2-inch border on the short ends), and layer your fillings in a neat row. For the chicken tikka version: a smear of light mayo, a handful of spinach, sliced tomatoes, red onion rings, and warm sliced chicken tikka.
- Roll and slice. Fold the short ends in over the filling, then roll the wrap up tightly from one long side, burrito-style. If serving immediately, slice in half on a diagonal — the cross-section is what makes the viral photo. Secure with a toothpick if it wants to unroll.
Tips for the Perfect Cottage Cheese Wrap
Most of the failed attempts you see in comment sections come down to one of these fixable mistakes:
- Blend longer than you think. “Almost smooth” is not smooth. Run the blender a full 45–60 seconds. If you can see a single curd, keep going. Grainy batter equals a grainy, fragile wrap.
- Use real parchment, and oil it. Cottage cheese bakes sticky. Unlined or dry-parchment sheets will bond the wrap to the pan permanently. A light mist of oil is cheap insurance.
- Do not underbake. A wrap pulled at 20 minutes when the center still looks wet will be floppy and tear. Wait until the surface is fully matte and the edges are deeply golden. When in doubt, give it 3 more minutes.
- Let it cool before peeling. Heat makes the proteins soft and clingy; cooling firms them. The 5–10 minute rest is the difference between a clean release and a torn mess.
- Spread evenly or suffer the edges. Thin spots overbake into crackers while thick spots stay soggy. Take the extra 30 seconds with the spatula — an even 1/8 inch across the whole rectangle is the target.
- Full-fat cottage cheese works best. Low-fat and fat-free versions contain more water and stabilizers, which makes a wetter batter and a less flexible wrap. If you only have low-fat, drain it in a sieve for 10 minutes first.
Variations
Once you have the base technique down, the wrap is a blank canvas. Try these twists:
- Everything-bagel wrap: Sprinkle 1 tablespoon of everything bagel seasoning over the batter before baking. Perfect with smoked salmon and cream cheese.
- Parmesan-herb wrap: Blend in 2 tablespoons of grated Parmesan and 1/2 teaspoon of dried Italian herbs for a pizza-adjacent flavor that loves turkey and pesto fillings.
- Spicy desi wrap: Add 1/4 teaspoon each of cumin and Kashmiri red chili powder to the batter, and fill with chicken tikka, mint raita, and pickled onions.
- Dairy-free-ish swap: This one is hard to make dairy-free since cottage cheese is the star, but lactose-free cottage cheese works identically for those with lactose sensitivity.
- Mini snack wraps: Divide the batter between two quarter-sheet pans (or bake half at a time) for smaller, taco-sized wraps — great for kids’ lunchboxes.
Storage & Reheating
Refrigerate unfilled wraps for up to 4 days. Stack them with sheets of parchment between each wrap and seal in a zip-top bag or airtight container — they will stick to each other without the parchment.
Freeze for up to 2 months: layer with parchment, wrap the stack tightly in plastic wrap, then foil. Thaw overnight in the refrigerator.
Reheating: These wraps are best at room temperature or just barely warmed. To refresh a refrigerated wrap, warm it in a dry skillet over medium heat for 30–45 seconds per side, or microwave for 15 seconds. Do not overheat — high heat makes them rubbery. Assemble fillings fresh; do not store the wrap already filled, as wet fillings will soften it.
Frequently Asked Questions
Does it actually taste like cottage cheese?
No — and that is the surprise that made it viral. Baking transforms the flavor; the finished wrap tastes savory, eggy, and mildly toasty. Even cottage cheese skeptics tend to like it.
Why did my wrap crack when I rolled it?
Usually one of three things: it was underbaked (wet center = weak structure), spread too thin, or rolled while still hot. Bake until fully matte and golden, keep an even 1/8-inch thickness, and cool at least 10 minutes before rolling.
Can I make it without a blender?
A blender or food processor is strongly recommended. Whisking by hand leaves curds intact, and the wrap will have a lumpy, cottage-cheese-forward texture and may not hold together. An inexpensive immersion blender also works.
Is the cottage cheese wrap keto?
Yes. With roughly 3–4 grams of net carbs per wrap, it fits comfortably into ketogenic and low-carb diets, and the high protein content is a bonus.
How much protein is in one wrap?
Approximately 20–25 grams from the wrap alone (1 cup of full-fat cottage cheese has about 23 g of protein; 2 eggs add about 12 g — so a single wrap lands around 30+ g total before fillings, though batter volume varies slightly by brand).
Can I use ricotta instead of cottage cheese?
You can, but the texture changes: ricotta is wetter and yields a softer, more delicate wrap that tears more easily. If you try it, drain the ricotta well and expect a creamier result.
The viral cottage cheese wrap is one of those rare internet recipes that is more than a gimmick — it is a genuinely useful, high-protein, flourless wrap you will find yourself making on busy weeks long after the trend scrolls past. Blend it smooth, bake it golden, cool it patiently, and fill it boldly. Your lunch rotation just got an upgrade.